|
<< Click to Display Table of Contents >> Digiplex 48/848/NE96 |
  
|
|
<< Click to Display Table of Contents >> Digiplex 48/848/NE96 |
|
This file includes instructions for the Paradox Digiplex 48 / 848 / NE96 panels using LED and LCD keypads. |
|
|
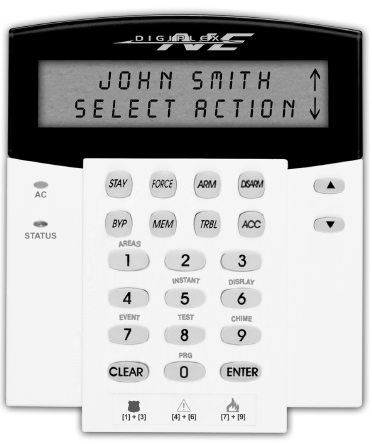
Click above links to view the pdf Manuals. Click the thumbnails for expanded keypad views.
ARMING/DISARMING
Regular Arming
1.Enter you Access Code
2.Press the ARM key.
3.If you have access to more than one partition, press the key corresponding to the applicable Partition Number, or 0 for all areas.
Stay Arming
1.Enter you Access Code
2.Press the STAY key.
3.If you have access to more than one partition, press the key corresponding to the applicable Partition Number , or 0 for all areas.
Force Arming
Arms system, while automatically bypassing open zones. If bypassed zones close during armed period, they will become armed as well.
1.Enter you Access Code
2.Press the FORCE key.
3.If you have access to more than one partition, press the key corresponding to the applicable Partition Number , or 0 for all areas.
DISARMING
1.Enter your Access Code
2.Press the DISARM key.
3.If you have access to more than one partition, press the key corresponding to the applicable Partition Number, or 0 for all areas.
BYPASSING
1.Enter you Access Code
2.Press the BYP key
3.Enter the 2-digit Zone Number(s) that you want to bypass. The corresponding number(s) will illuminate.
If using an LCD keypad you can also use the Up Arrow and Down Arrow keys to scroll through the zones, and press BYP when the zone you want to bypass is displayed.
4.Press the ENTER key to exit.
|
If a zone’s number does not illuminate and the keypad emits a Rejection Beep, the zone may not have the Bypass feature accessible. Fire zones can not be bypassed. |
resetting Fire alarms
•To disable a fire alarm enter the Access Code.
•The Fire Zone may reset itself once the problem has cleared. If it does not, simultaneously press and hold the CLEAR and ENTER keys for two seconds.
DOOR CHIME
1.Enter the Access Code
2.Press the CHIME (9) key
3.Press the 1 key
4.enter the 2-digit Zone Number(s) of the zones you want to chime
If using an LCD keypad, you can use the Up Arrow/Down Arrow keys to find the zone you want, then press the ACC key to chime or unchime the zone that appears on the screen. Press the ENTER key to save the selection.
5.Press the CLEAR key to exit.
alarm MEMORY
To view or clear the list of alarms that occurred:
1.Press the MEM key. The numerical symbols for each zone whose alarm was triggered will illuminate.
On an LCD keypad, each zone that was breached while armed will appear on the screen, below 'ALARM IN...'
2.Press the CLEAR button to exit the Alarm Memory Display. The MEM symbol and numerical symbols will extinguish.
TROUBLE display
1.Press the TRBL key when the TRBL action light illuminates. The TRBL Symbol will flash and the Numerical Symbol(s) representing Group heading number(s) will illuminate.
2.Press the Number Key corresponding to the Group heading to view the specific trouble.
On an LCD keypad the message "Trouble(s) [TRBL] to view" will be displayed. Use the Up Arrow/Down Arrow keys to scroll through the Groups experiencing a trouble. Press the Number Key of the trouble you wish to view.
Group 1 - System 1) - AC Failure 2) - Low Battery 3) - Aux Current Limit 4) - Bell Current Limit 5) - Bell Absent 6) - ROM check Error Group 2 - Communicator 1) - TLM Trouble 2) - Fail to communicate on line 1 3) - Fail to communicate on line 2 4) - Fail to communicate on line 3 5) - Fail to communicate on line 4 6) - Fail to communicate on line PC Group 3 - Modules Trouble 1) - Module Tamper 2) - ROM Check Error 3) - TLM Trouble 4) - Fail to Communicate 5) - Printer Trouble 6) - AC Failr 7) - Battery Failure 8) - Supply Output Group 4 - Bus Troubles 1) - Missing Keypad 2) - Missing Module 6) - General Failure 7) - Bus Overload 8) - Bus Communication Error Group 5 - Zone Tamper The Numerical Symbols for the zone or zones that have been tampered with will be illuminated. Group 6 - Zone Low Battery If a wireless device's battery needs to be replaced, the Numerical Symbol for the zone that it is assigned to will be illuminated. Also, the yellow light on the device will flash to indicate this trouble. Group 7 - Zone Fault A smoke detector is experiencing a wiring problem, needs to be cleaned, or a wireless device is no longer communicating with its receiver. Group 8 - Clock Loss The time and date have been reset to the default. |
TIME AND DATE
led keypads
1.Enter your Access Code
2.Press the TRBL key
3.Press the 8 key
4.Enter the hour and minutes according to the 24 hour clock (i.e. 9AM is 09:00, 9PM is 21:00)
5.Enter the correct date according to YYYY/MM/DD
6.Press the CLEAR key to exit the menu
LCD Keypads
1.Enter your Access Code
2.Press the TRBL key
3.Press the 8 key
4.To change the time, place the cursor under the number you want to change by using the Up Arrow key and enter the hour and minutes according to a 24-hour clock (i.e. 9AM is 09:00, 9PM is 21:00)
5.To change the date, place the cursor under the number you want to change and enter the correct date according to year/month/day
6.Press the ENTER button to exit
ACCESS CODES
|
Programming access codes on this system is fairly complex, it is HIGHLY reccomended that you refer all requests for code changes to the Dealer. |
programming user codes (LED keypad)
1.Enter your Master Access Code (a System Master Code or User Access Code with the Master feature)
2.Press 0 to enter the User Programming Menu. The Area Symbols of the areas assigned to your User Access Code and the PRG Symbol will flash.
3.Press the ACC key. The Area Symbols of the areas assigned to your User Access Code and the ACCESS Symbol will illuminate. The PRG Symbol will continue to flash.
4.Enter the 2-digit User Number (02 to 64) you want to program. The ACCESS Symbol will flash for an unused code. If the code is used, the PRG Symbol and first number of the code will illuminate. The ACCESS Symbol and the Area Symbols will extinguish.
If the alarm panel is a Digiplex NE96, enter a 3-digit User Number (002 to 999)
5.Enter a User Code. If you do not want to change an existing one, press the Up Arrow key until you reach User Options. The keypad will emit a Half Beep when it switches to User Options. Preexisting options will illuminate.
6.Program the User Options (See Table 1 on page 25 in LED manual) by turning ON or OFF the options. Once the options are programmed, press the Up Arrow key to reach the Area Assignment. The keypad will emit a Half Beep when it switches to Area Assignment. Pre-existing assignments will illuminate.
7.Program the Area Assignment (see Table 2 on page 28 in the LED manual). Press the Down Arrow key to return to User Options or press ENTER to save and exit. The keypad will emit a Confirmation Beep to confirm the code’s acceptance.
|
If the keypad emits a Rejection Beep, you may have chosen an existing User Code or the Master Code used to modify or create the code does not have access to the User Options or Area Assignment programmed. |
deleting a user code
To delete existing Access Codes, press the CLEAR key in steps 5, 6, and 7 shown above. Once the information is erased, press the ENTER key to save and exit.
changing the system master code (LED keypad)
|
Take special care when changing the Master Code. Errors changing the Master Code will likely require a service call from a technician to correct.The Master Code can not be deleted. |
1.Enter the current System Master Code. The keypad will emit a Confirmation Beep. The ACCESS Symbol will flash.
2.Press the 0 key. The keypad will emit a Confirmation Beep. The Area Symbols and the PRG Symbol will flash.
3.Press the ACC key. The keypad will emit a Confirmation Beep. The Area Symbols and the ACCESS Symbol will illuminate. The PRG Symbol will flash.
4.Enter the User Number 01 for a Digiplex system (or 001 for a Digiplex NE96 system). The keypad will emit a Confirmation Beep. The PRG Symbol and the Numerical Symbol of the first number in the code will illuminate (10 =zero). The Area Symbols and ACCESS Symbol will extinguish.
5.Enter a New Access Code. The Numerical Symbols for the next numbers in the code will illuminate one at a time as you enter the new code. When you have entered the maximum number of digits, the keypad will emit a Confirmation Beep.
6.Press the ENTER key to exit.
access code changes with an LCD keypad
Refer to the LCD user manual for instructions