|
<< Click to Display Table of Contents >> ELK M1 |
  
|
|
<< Click to Display Table of Contents >> ELK M1 |
|
This file contains information on the ELK M1 panel. |
|
|
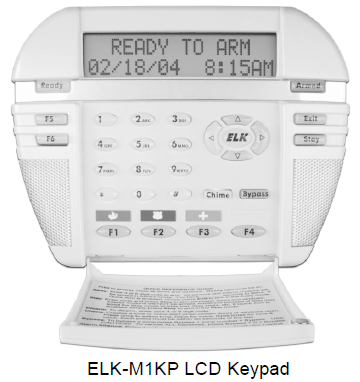
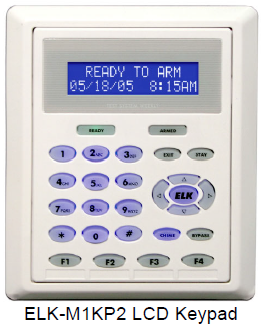
For complete instructions click above link for the pdf manual. Click thumbnails for expanded keypad views.
Arming/Disarming
Away Arming
1.Ensure that the READY light is on or flashing.
2.Enter a User Code. The ARMED and EXIT lights will illuminate and the exit tone will start.
3.Leave the premises before the delay expires.
Stay Arming
1.Ensure that the READY light is on or flashing.
2.Enter a User Code. The ARMED and EXIT lights will illuminate and the exit tone will start.
3.Press the STAY key. The key will light up.
Disarming/Silencing after an alarm
•If alarms occurred, the display will show the alarm type and the first zone that tripped.
•Enter a valid User Code. The Entry delay tone and/or siren should stop. When the ARMED light turns off, the system is disarmed.
Bypassing
1.Press the BYPASS key.
2.Enter the number of the Zone you wish to bypass.
3.Press the BYPASS key again.
•The BYPASS light will come on if the bypass was successful; however, if the zone is not bypassable, an error tone will be heard.
•All bypasses are removed when the system is disarmed.
Silencing a Fire alarm
1.To silence the alarm, enter a valid User Code.
2.The display continues to show 'Fire Alarm' until the detectors are reset. and you enter your User Code again to acknowledge the alarm.
Resetting Smoke Detectors
|
It is necessary to reset the smoke detector circuitry following an alarm in order for any subsequent fire alarms to be detected! |
1.Press the ELK key. Enter a User Code if prompted.
2.Use the Up or Down Arrow keys to find '2-Reset Smoke Detectors'.
3.Press the Right Arrow key to select this menu.
4.The keypad will display '5 Seconds Smoke Output Reset'.
5.Two beeps from the keypad indicate the reset is complete. The keypad will automatically return to the main display.
Zone Status
This allows a comprehensive viewing of the status for all area zones
1.Press the ELK key. Enter a User Code if prompted.
2.Use the Up or Down Arrow keys to find 'Menu 5-View Status'.
3.Press the Right Arrow key to select this menu.
4.The first zone is displayed with it's current status and name.
5.Use the Up or Down Arrow keys to scroll through all zones.
6.Press the * key when done to exit back to the menu selections.
Chime Control
1.When the Chime Mode is on, the CHIME key will be lit. To turn the chime mode OFF, press the CHIME key one time.
2.When the Chime Mode is off, the CHIME key will not be lit. To turn the Chime mode ON:
•Press the CHIME key one time to select the CHIME TONE mode.
•Press the CHIME key a second time within 30 seconds to select the CHIME VOICE mode.
•Press the CHIME key a third time within 30 seconds to select the CHIME TONE/VOICE mode.
•Pressing the CHIME key a fourth time withi 30 seconds will once again turn the Chime Mode off.
Setting Time & Date
1.Press the ELK key. Enter aUMaster Level User Code.
2.Use the Up Arrow key to find '8-System Settings'.
3.Press the Right Arrow key to select this menu.
4.There are 8 sub-menus. Navigate to sub-menu '81-Set Sys Clock' if not already displayed.
5.Enter a number (1-7) for the Day. 1 = Sunday, 2 = Monday, etc.
6.Use the Right Arrow to move to the Month/Day/Year.
7.Enter 2 digits for the Month, 2 for Date, and 2 for Year. The cursor will move to Hour/Min.
8.Enter 2 digits for Hour, and 2 for Minutes (using 24 hour clock format).
•If a mistake is made use the Right or Left Arrow keys to edit.
9.When done, press the ELK key to save.
10.To exit from user menus, press the * key.
Troubles
•Troubles are annunciated by an intermittent beeping from the keypad and a display of the Trouble Condition(s), including:
AC Power Failure
Low Backup Battery
Telephone Line Fault
Fire Alarm Trouble
Missing Keypad, Expander (zone or output)
Communications Fail
•The beeping may be silenced by pressing the * key but the trouble must be acknowledged before any other keypad operation may continue.
•To Acknowledge a trouble condition, enter a User Code. Until the trouble condition is resolved, the keypad will momentarily flash the condition along with the normal keypad information. If a new Trouble should occur, the keypad beeping will resume.
Change User Codes
1.Press the ELK key. Enter a Master Level User Code.
2.Press the Up Arrow key to find, 'Menu 6-Change User Codes'.
3.Press the Right Arrow key to select this menu.
4.Use the Up Arrow to locate a user, or, enter a 3 digit User Number to jump to that user.
5.To change the code, press the Right Arrow and enter the new Code.
6.If the Code is accepted the keypad beeps 3 times. If a long error tone is heard, the keypad will display, 'Code Not Authorized'. Press the Right Arrow to "Redo" and repeat step 5 using different digits.
7.When done, press the * key to exit back to the main display.